The Simple layout in Armband Creator is designed for younger players — think 8U through 12U baseball and softball. Instead of a dense grid of numbers, it uses color-coded columns that make it easy for kids to find the right play at a glance. A coach calls out a color and a number, and the player looks it up on their wrist. No confusion, no delay.
This guide walks you through creating a Simple wristband from start to finish. By the end, you’ll have a print-ready PDF with play-call cards for your entire roster. All you need is an Armband Creator account and the supplies you need to print and assemble the wristbands. If you coach older players (14U+) and need more plays, the Advanced layout packs 150 positions into a tighter grid — check out our Advanced wristband guide for the full walkthrough.
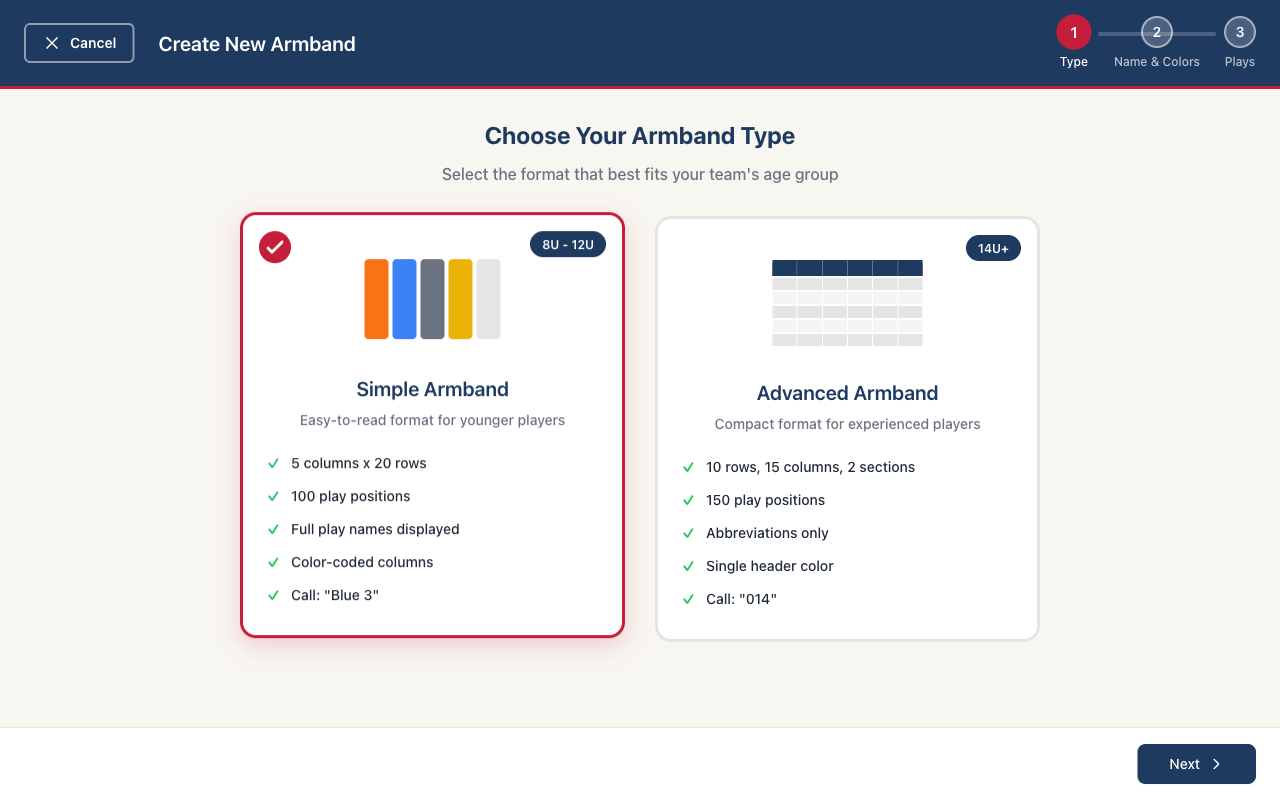
Step 1: Log In and Choose the Simple Layout
Log into your Armband Creator account and click the button to create a new armband. You’ll be asked to choose a layout — select Simple. This gives you a 5-column, 20-row grid with 100 total positions, organized by color-coded columns. It’s the right choice for younger age groups where simplicity and speed matter more than volume.
Step 2: Name Your Armband and Pick Team Colors
First, give your wristband a name — something like “Braves 2026 Fall Season” or “Lady Bucs 2026 Spring.” This helps you find it later if you create multiple wristbands for different seasons or situations. Then choose an armband title — this is what shows at the top of the printed wristband. Keep it short and descriptive, like “Offense” or “Defense.”
Next, choose your column colors. Each column in the Simple layout gets its own color, which is how players locate plays during the game. Pick colors that match your team identity or simply choose ones that are easy to tell apart at a glance. High contrast between columns helps younger players find the right one quickly.

Step 3: Add Your Plays
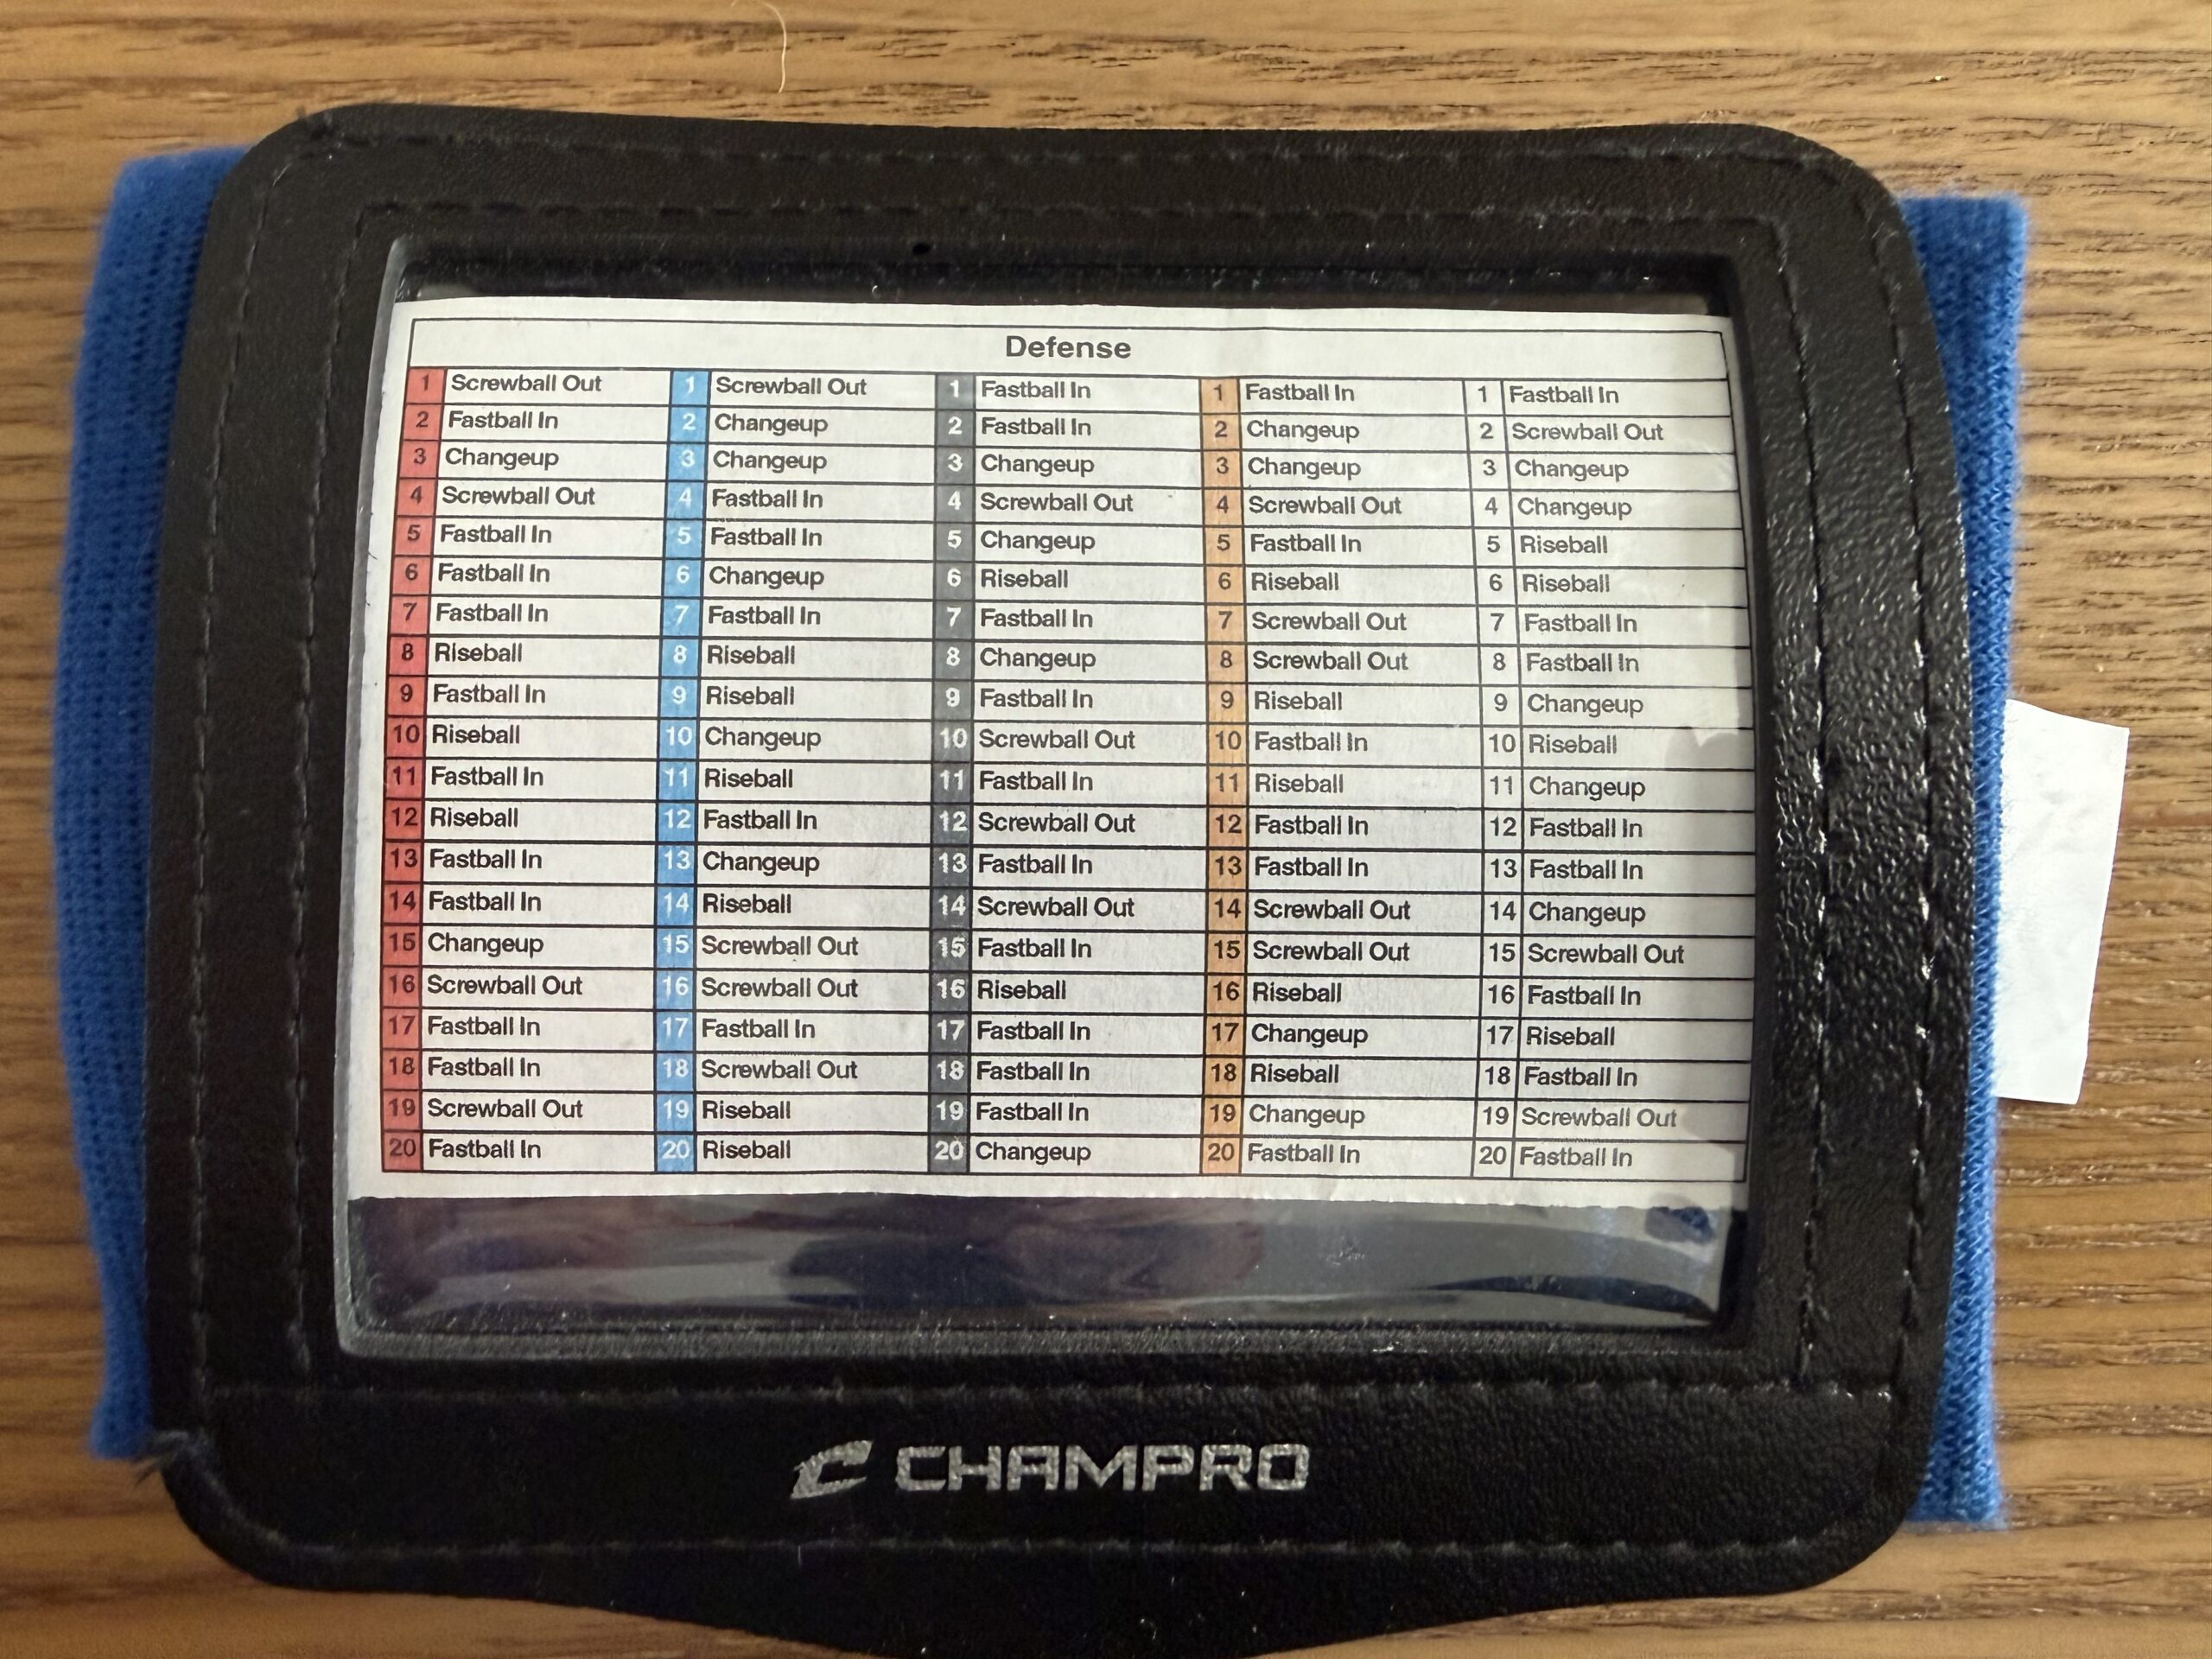
Now fill in your plays. Each column holds a set of plays grouped by color, and each row within that column is numbered. To call a play during a game, you’ll tell the player a color and a number — for example, “Blue 3” — and they’ll look it up on their wrist.

Step 4: Download the PDF
When you’re happy with the layout, click the download button. Armband Creator generates two PDFs: a wristband sheet with 8 copies of your card, and a call sheet that lists every play by position so you have a quick reference in the dugout. Print as many copies as you need for your roster and coaches.
Both PDFs are formatted for standard 8.5″ x 11″ letter paper. No special print settings needed — just hit print. Color printing is recommended so the column colors show up clearly, but black-and-white works if that’s all you have. For extra durability, consider printing on a thicker paper like card stock — it holds up better in wristband sleeves and can survive without laminating if needed.

Step 5: Print, Cut, and Slide Into Sleeves
Print the wristband sheet, optionally laminate it for durability, then cut along the printed guidelines to separate the individual cards. Slide each card into a wristband sleeve and hand them out to your players. The whole process takes just a few minutes once you have your supplies ready.
For a full breakdown of the printer, laminator, pouches, and wristband sleeves we recommend, check out our supplies guide.
Tips for Coaches
- Keep plays simple for younger players. Short, clear play names work best — “Bunt,” “Steal 2nd,” “Hit & Run.” If a player can’t read it in one second, it’s too long.
- Laminate for durability. A laminated card can last an entire season. An unlaminated one might not survive a single humid doubleheader. It’s worth the extra step.
- Upgrade to Advanced when your players are ready. Once your team moves to 14U and beyond, the Advanced layout gives you 150 positions across a 30×5 grid — room for a much deeper playbook. Armband Creator was built by coaches, for coaches, so both layouts are designed around how teams actually communicate on the field.
Ready to Build Your First Wristband?
Armband Creator is a one-time purchase of $99 — lifetime access, no subscription, no recurring fees. Create unlimited wristbands for every season, every lineup, and every situation. See the full walkthrough on our How It Works page, then get started.