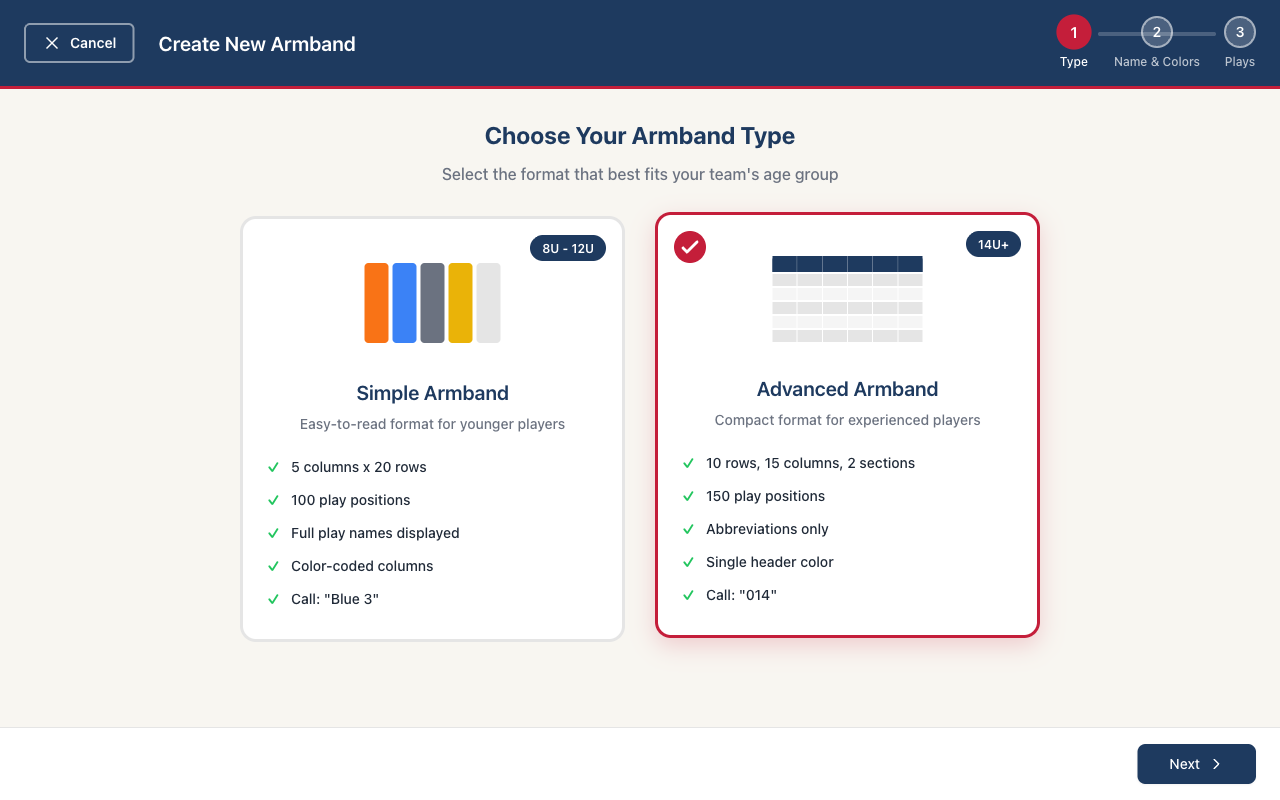
The Advanced layout in Armband Creator is built for competitive baseball and softball — 14U travel ball, high school varsity, college programs, and any team that needs a deep playbook on every player’s wrist. It packs 150 positions into a compact 30×5 grid using three-character abbreviations and numeric calls. If your team has outgrown color-and-number signaling, this is the layout you want.
This guide walks you through creating an Advanced wristband from start to finish. By the end, you’ll have a print-ready PDF with play-call cards for your entire roster and a coach’s call sheet for the dugout. All you need is an Armband Creator account and the supplies to print and assemble the wristbands. If you coach younger players (8U–12U) who need something simpler, check out our Simple wristband guide instead.
Step 1: Log In and Choose the Advanced Layout
Log into your Armband Creator account and click the button to create a new armband. You’ll see two layout options — select Advanced. This gives you a 30-row by 5-column grid with 150 total positions. Each position holds a three-character abbreviation, and plays are called by a three-digit number. It’s designed for experienced players who can handle a denser card and faster signal recognition.
Step 2: Name Your Armband and Pick a Header Color
First, give your wristband a name — something like “Braves 2026 Fall Season” or “Lady Bucs 2026 Spring.” This keeps things organized if you create multiple wristbands for different situations, lineups, or seasons. Then choose an armband title — this is what shows at the top of the printed wristband. Keep it short and descriptive, like “Offense” or “Defense.”
Next, choose a header color for your wristband. Unlike the Simple layout where each column gets its own color, the Advanced layout uses a single header color across the top of the grid. Pick your team’s primary color or whatever stands out best against the white card background.

Step 3: Add Your Plays
This is where the Advanced layout really shines. You have 150 positions to work with — enough room for a full offensive playbook, defensive signals, situational plays, and decoys all on a single card. Enter a play for each position you want to fill. You don’t have to use all 150, but the space is there when you need it.
Each play is displayed as a three-character abbreviation on the printed card. Keep your abbreviations consistent and make sure your players know the shorthand. For example, “H&R” for hit and run, “SB2” for steal second, “BNT” for bunt. The shorter and clearer, the better — your players need to read it at a glance during live action.

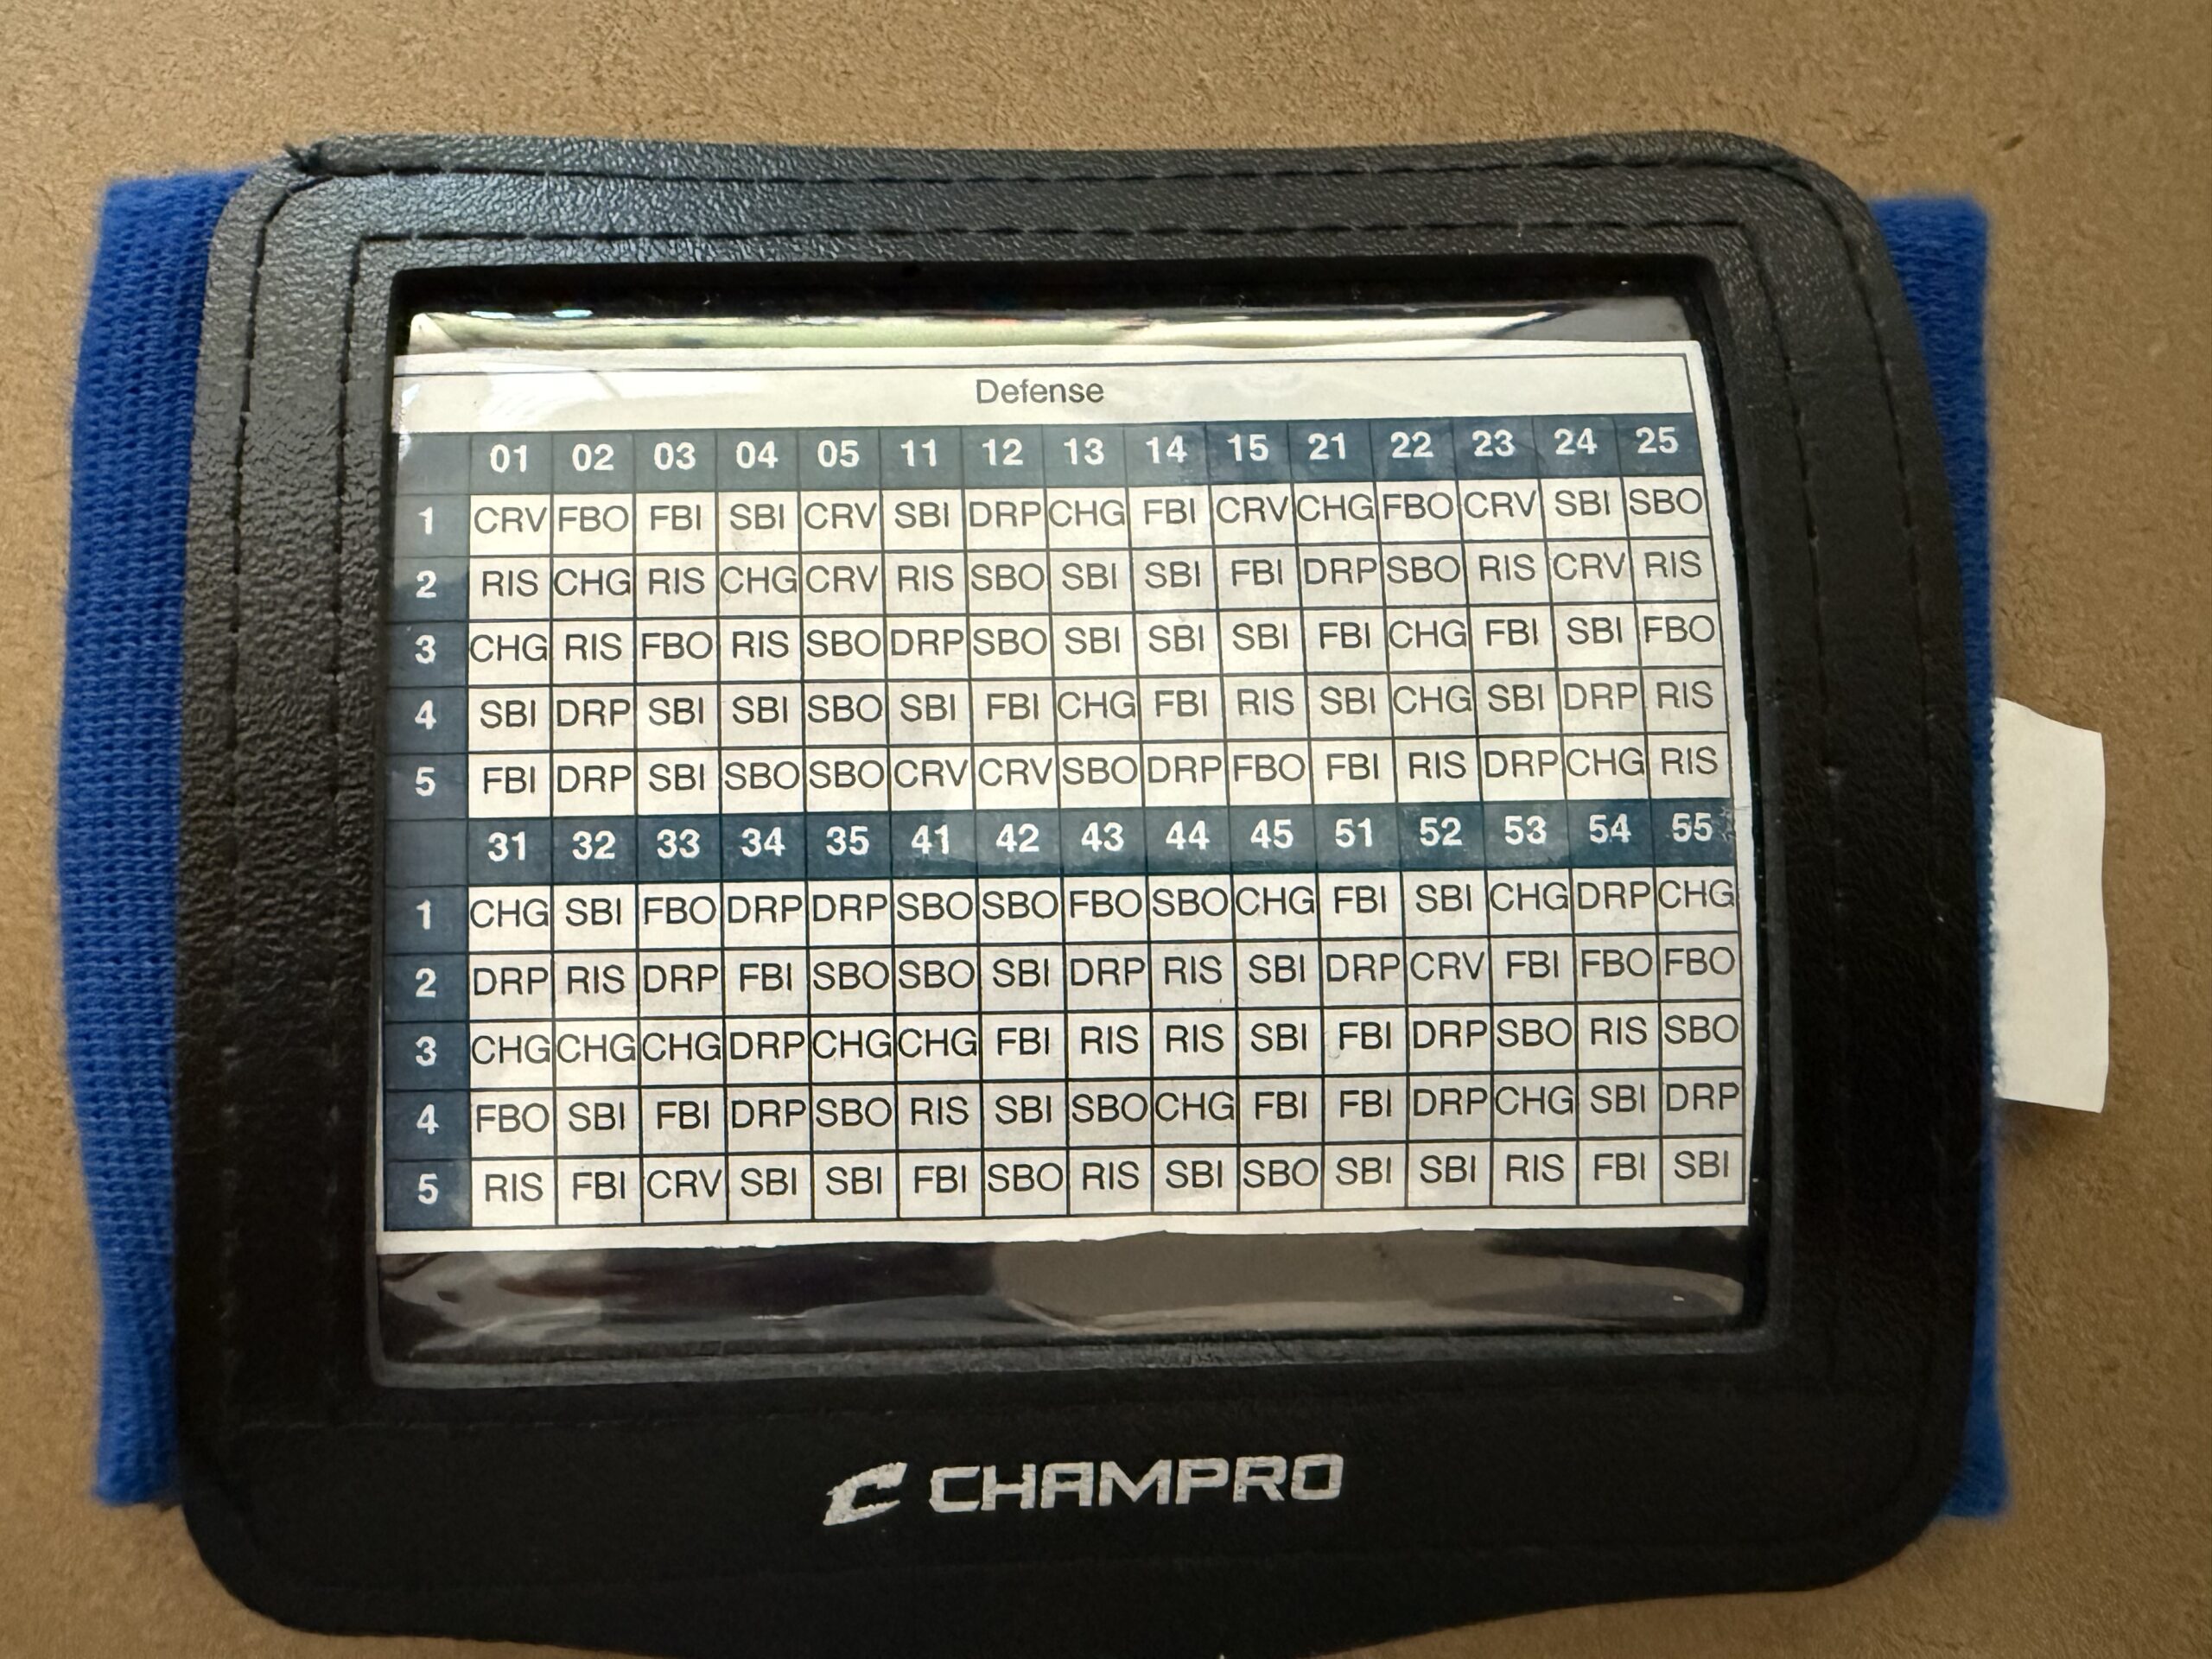
How Play Calling Works with the Advanced Layout
In the Advanced layout, plays are called using a three-digit number. The coach calls the number, and the player finds it on the grid to see the corresponding play. It works like a spreadsheet — the player reads the top number first to find the column, then the last digit maps to the row. For example, “01” means column 0, row 1 — the very first column, first row. The accompanying call sheet tells you which number maps to which play — keep it in the dugout for quick reference.
Step 4: Download the PDF
When your plays are set, click the download button. Armband Creator generates two PDFs: a wristband sheet with 8 copies of your card, and a call sheet that maps every position number to its play so you have a cheat sheet in the dugout. Print as many copies as you need for your roster and coaches.
Both PDFs are formatted for standard 8.5″ x 11″ letter paper. Print settings are straightforward — just hit print. Color printing makes the header pop, but black-and-white works fine since the Advanced layout relies on numbers rather than color coding. For extra durability, consider printing on a thicker paper like card stock — it holds up better in wristband sleeves and can survive without laminating if needed.

Step 5: Print, Cut, and Slide Into Sleeves
Print the wristband sheet, optionally laminate it for durability, then cut along the printed guidelines to separate the individual cards. Slide each card into a wristband sleeve and hand them out to your players. The whole process takes just a few minutes once you have your supplies ready.
For a full breakdown of the printer, laminator, pouches, and wristband sleeves we recommend, check out our supplies guide.
Tips for Coaches Using the Advanced Layout
- Use decoy positions. You have 150 slots — you don’t need a real play in every one. Fill unused positions with dummy abbreviations to make it harder for the other team to narrow down your live plays.
- Create separate armbands for offense and defense. With 150 positions per card, you have plenty of room on a single card — but some coaches prefer a dedicated offensive and defensive wristband. You can create as many armbands as you need.
- Laminate for the season. At the competitive level, games happen in all conditions. A laminated card handles sweat, rain, and sliding without falling apart. It’s a small step that saves you from reprinting mid-season.
Advanced vs. Simple: Which One Should You Use?
The Simple layout uses 5 color-coded columns with full play names — perfect for younger players (8U–12U) who need to find a play fast without memorizing abbreviations. The Advanced layout trades readability for capacity: 150 positions, three-character codes, and numeric calls that are harder for opponents to decode.
There’s no hard rule about when to switch. Some 12U travel teams use Advanced because they run a complex playbook. Some high school JV teams prefer Simple because their players are still learning signals. Go with whatever your players can execute confidently during a game. You can always check the FAQ for more details on choosing a layout.
Ready to Build Your First Advanced Wristband?
Armband Creator is a one-time purchase of $99 — lifetime access, no subscription, no recurring fees. Create unlimited wristbands for every season, every lineup, and every situation. See the full walkthrough on our How It Works page, then get started.